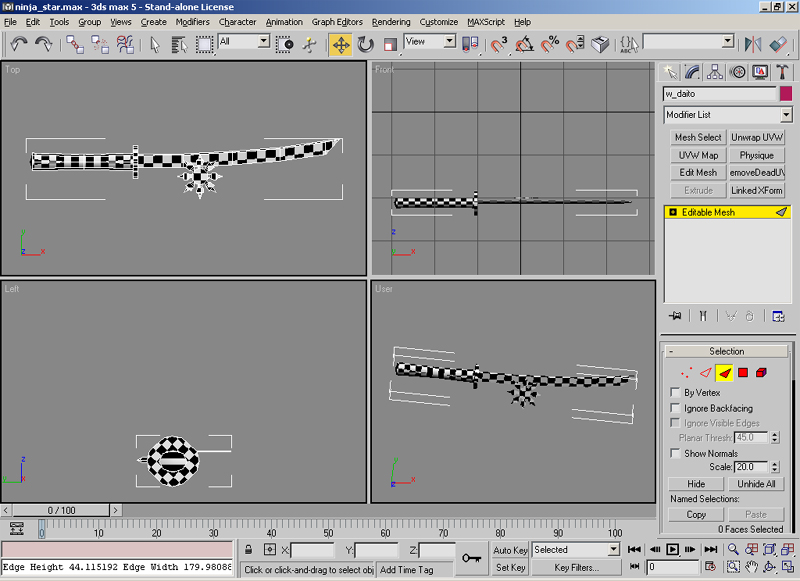
Initially, we have just our default mesh, without any arms. I'm using the mesh for my daito sword model here, with a basic checker texture so that I can look for any texture coordinate stretching.
At this point, if you're making a weapon model, you'll have to add in the hand models. These can be found here. Note that in addition to these arms, you will also have to add different tags for different types of weapons. For example, a handcannon model does not use the laser or silencer tags to place those objects on the model in first person view, but an m4 model would. If you are unsure what tags belong on your model, open the appropriate file from the Reaction Quake 3 .pk3 files in Npherno's md3 compiler, and look at what tags are present. Pk3 files can be opened in any zip program, such as winzip. Once you have the arms added, scale your weapon to match, and position it about how you'd want it to be held.
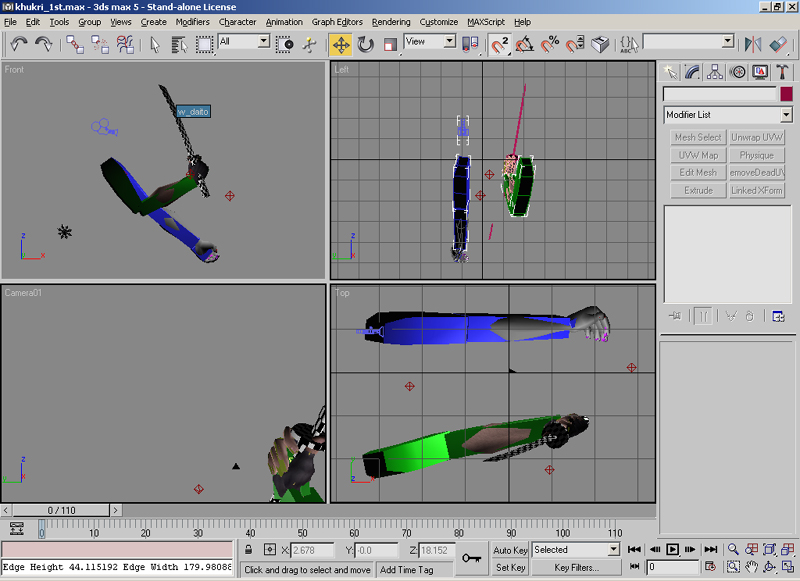
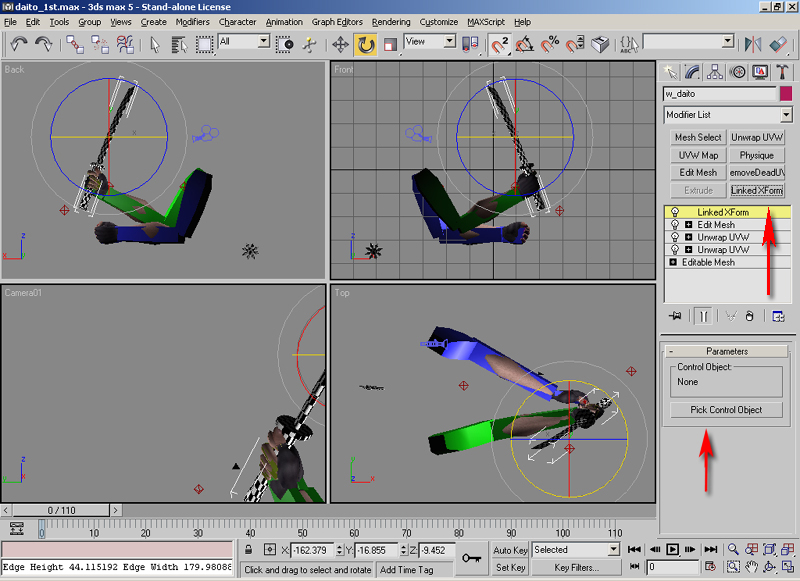
At this point, your weapon model is in the right position, and is the right size, but its movements do not follow those of the arms. Rather than trying to animate the arms and the weapon independently, and then try to make them match, we can make the weapon's movements follow those of the arms. This is done with a linked X-Form modifier. By default, objects are not linked, as the following picture shows.
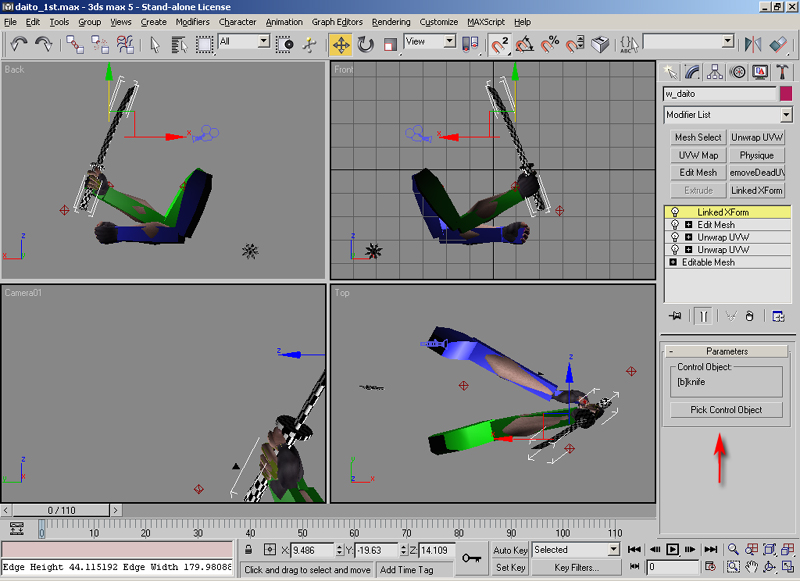
When you click the "Pick Control Object" button, you will be able to pick the object that you want your weapon to follow. This can be done by either directly clicking on it, or by selecting it from the list of objects in the scene. In my case, I'm linking to a bone I have, called [b]Knife.
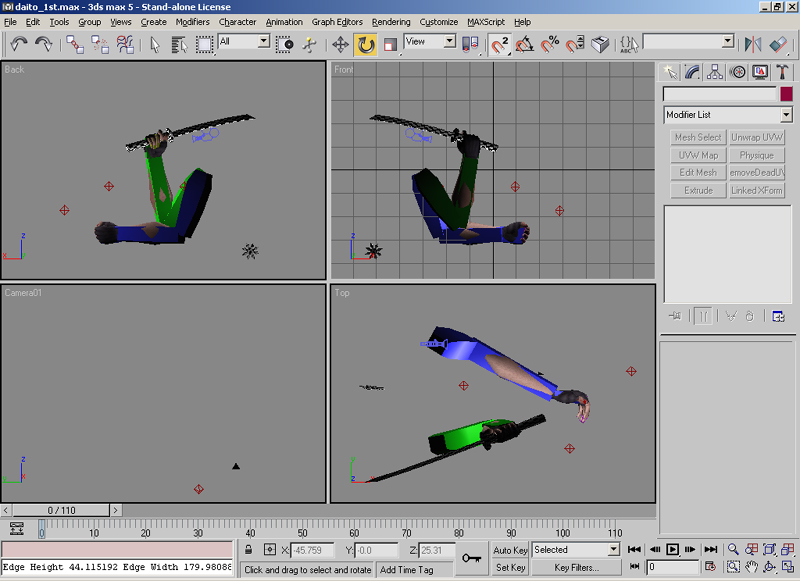
If you rotate the arms now (note that you should never move the arms themselves, only the biped which they are linked to), you should see your weapon move with it.
At this point, you can begin animating. I usually make a keyframe of the weapon at it's default position, and place copies of it along the timeline. This way, I can easily go back to my initial pose, and minimize and jerkiness or continuation errors in the process.
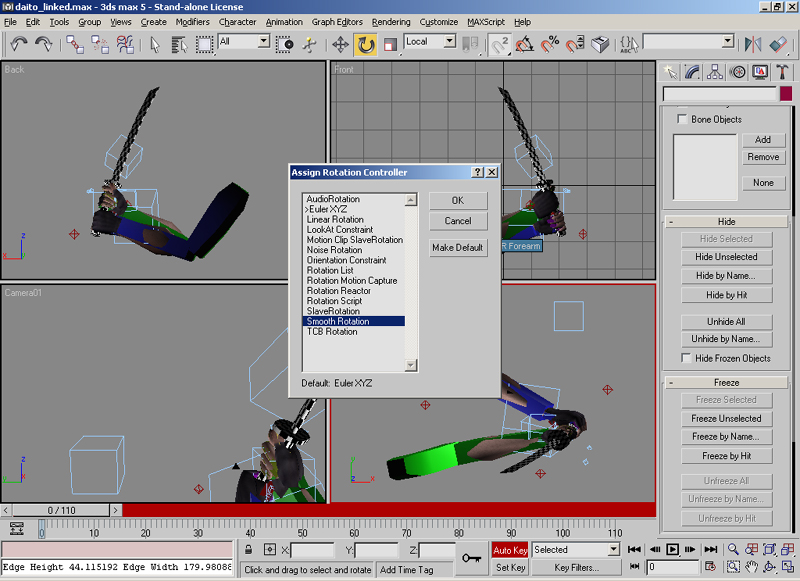
Another thing which you might find useful is to ensure that the rotation and movement controllers for your weapon are set to something like Smooth rotation. This often minimizes the amount of keyframing that is required to have something rotate and move around.
The list of what frames are used for each animation sequence can be found in the Reaction Quake 3 .pk3 files. They are located in a file called animation.cfg, with one in each directory for the different weapon models. Note that you MUST have this file in your directory, or else your animations will not work. Each animation.cfg file has information in the following format, although the exact lines will vary:
// animation config file
// first frame, num frames, looping frames, frames per second
//
0 21 0 30 // slice
21 1 0 10 // reload (redundant)
21 19 0 15 // idle (slice)
101 5 0 10 // disarm (slice)
105 5 0 10 // activate (slice)
104 1 0 10 // empty (slice/redundant?)
40 9 0 23 // extra1 - switch to throwing
94 7 0 15 // extra2 - switch to slice
49 9 0 10 // throw
57 30 0 15 // idle (throw)
86 5 0 10 // disarm (throw)
90 5 0 10 // activate (throw)
Looking at the first line, we see that this tells Quake 3 that you want 21 frames of animation, starting at frame 0, 0 frames will loop, that it should run at 30 frames per second, and that this animation is for the slice. Note that if you need, you can change the number of frames and framerate, provided that the running time is unchanged. For example, you could have 42 frames at 60 frames per second. Your animations should follow this file. As a result, the first 21 frames (0 inclusive), should contain the slice animation (if you are modelling a knife, as I am). By hitting the "n" key, you enter animating mode. At that point, I usually use auto-keyframes, so that when I change the position of an object at a frame, it stores that information for me automatically. Merely position the arm and weapon models where you want them to be at each point, and have it automatically keyframe the required information. It is best to have as few keyframes as possible. This will simplify your animation files, making them easier to edit and control.
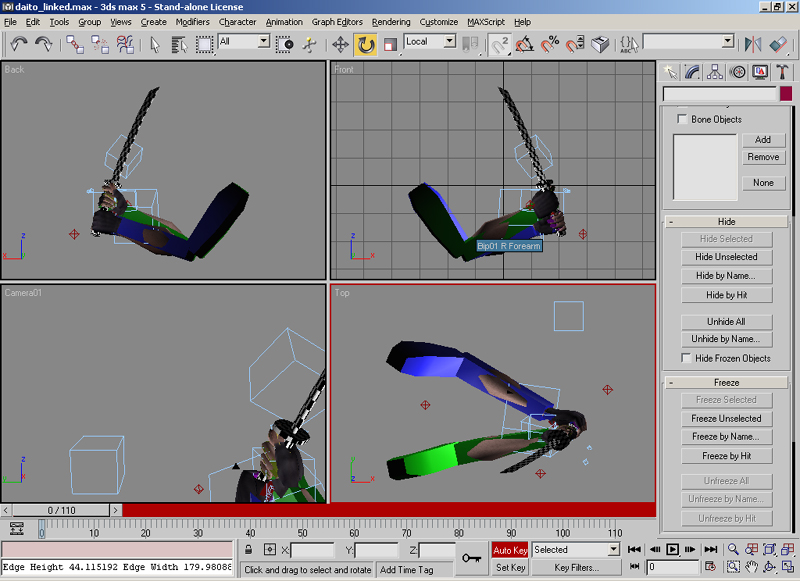
If you would prefer to use pre-made animations instead of making your own, and you have a copy of Character Studio, .bip files for each of the weapon types can be found here. To use these files, load up the arm file, and position your model as normal. Then, click the button shown in the following screenshot:
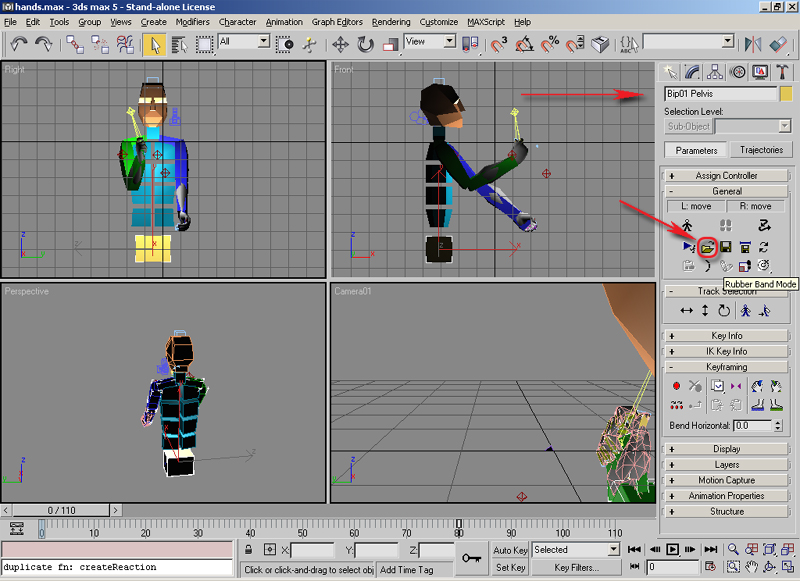
This will apply the animations in the .bip file to your model. Note that you will still need to bone, link, and otherwise setup your model to do this. You will also still need to create the tag_ files needed for your model. Once the .bip file is loaded, you can edit the animations to suit your model's dimensions and shape.
Once you have your model animated, you can export it. The exact
models and path structure is slightly different for each type of model
that this guide covers. All screenshots in this section will be from
exporting my weapon model, but to make other model types, you can
merely change the names used, as follows:
Weapon Models:
The file with the animations and the hands should be called
weaponType_1st.md3. All of the files for weapons should be
located in a directory called /weapons2/yourModelName under the
models directory. In my case, since I'm making a knife replacement
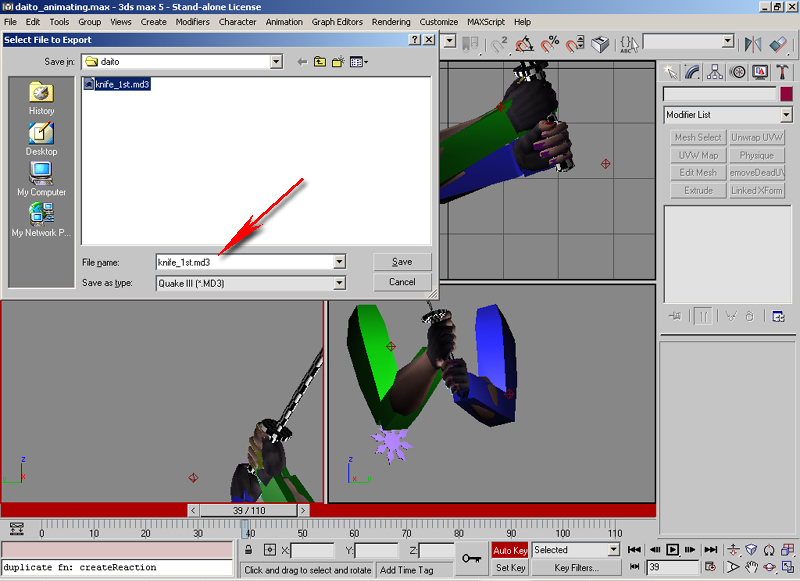
called daito, it is called models/weapons2/daito/knife_1st.md3. The
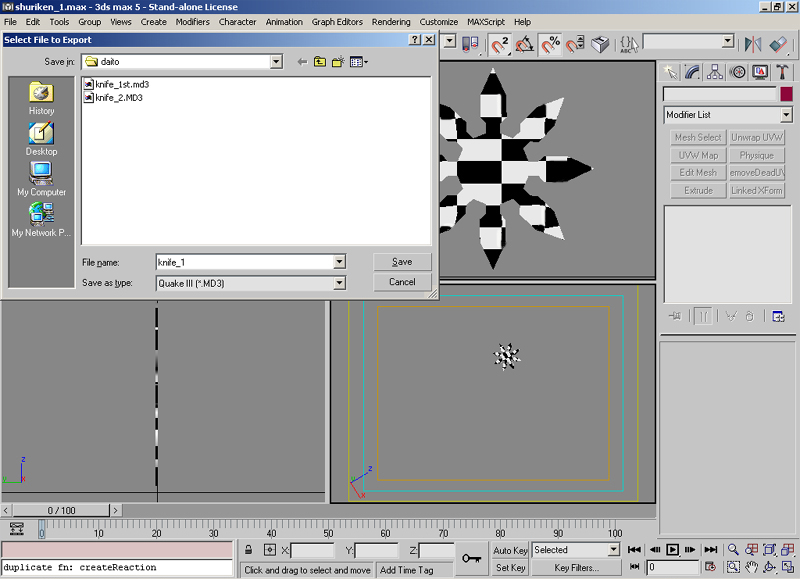
3rd person model is called weaponType.md3, and the LOD models are called
weaponType_1.md3 and weaponType_2.md3. Note that for
akimbo pistols, while the weaponType_1st.md3 file has two
pistols in it, the 3rd person and LOD files should contain only a
single pistol. Reaction Quake 3 code will place one pistol on each
hand of the player model for you.
Ammunition Models:
In the case of an ammo model, you would call this model
ammoType.md3, and
place it in the directory models/ammo/, along with its textures and
text files. Note that you can use .skin files to look in another
directory for textures if desired, so you can place only the .skin and
.md3 files in /ammo if you so desire, and place all of the texture
information in, for example, models/ammo/yourModelName. Ammunition models only have one .md3 file, and do not use LOD files.
Map Object Models:
Map objects can be stored and called anything that you wish. A useful
structure for them is
/models/mapobjects/yourName/modelName/modelName.md3. This will allow you to create as many map models as you want, without
needing to worry about naming conflicts with other mappers. Adding
map objects to Radiant, and adding effects such as weapon clipping to
them is not covered here however. Map objects only have one .md3
file, and do not use LOD files.
Item Models:
Item models are slightly different, in that the .md3 files are located as
/models/items/yourModelName.md3, but all other files are
located in the directory models/items/yourModelName/. Item
models only have one .md3 file, and do not use LOD files.
As mentioned above, the following screenshots show exporting a weapon
model. Merely change the model name and path in order to create a
model of a different type.
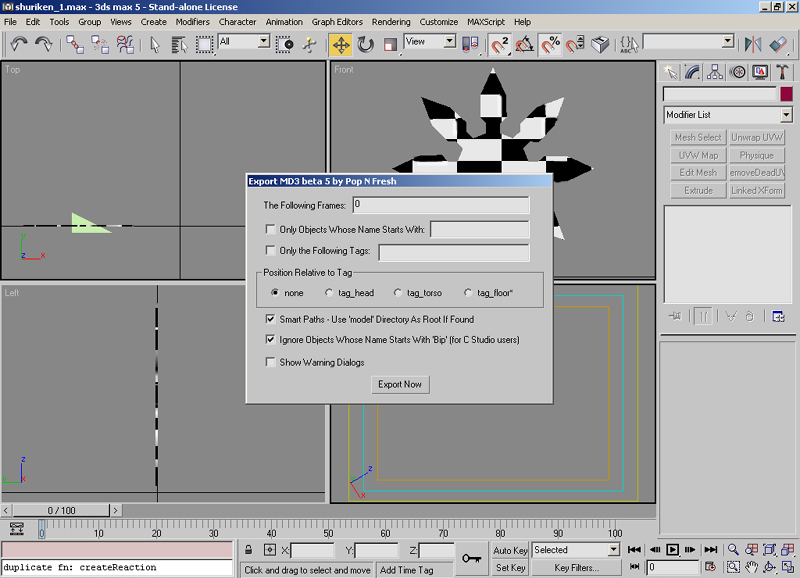
Select to export all the frames in the animation for the first person
model. LOD models, the 3rd person model, ammo, map object, and item models
all only need frame 0 to be exported, as they have no animations. Make sure that the checkbox to ignore bip objects is checked.
At this point, repeat the process with the world and LOD models. These models can be the same, but if possible, make the LOD ones with
a lower polycount. Note that ammo, map object, and item models do not have LOD
models, and this step can be ignored in their case.
At this point, render out a
picture of your model for the icons you will make later, close your
modelling program, and open Npherno's md3 compiler. This process will need to be repeated for each md3 file that you wish
to create.
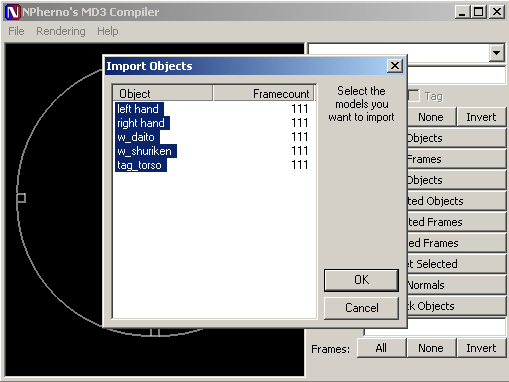
Open the file to be compiled, and select all of the objects. An
important point to mention here is that your object names cannot
contain funny characters such as spaces, or else the skins will not
work properly, nor allow you to create other skins for them without
recompiling (map objects are unique in that they will require you to
recompile the md3 for each skin you wish to use). If you have spaces
in a name, you can just rename that object when you have it open in
Npherno. Another thing to watch for is that each mesh object, other
than tags, should have its image path listed under its name once the
md3 is opened. If this is not the case, add it, using / slashes,
rather than \ ones. This will help those people using operating
systems like Linux.
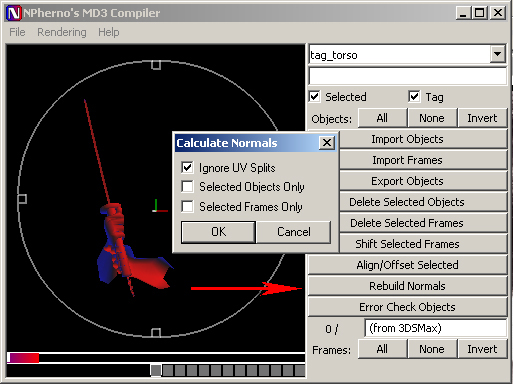
Next, after selecting all of the parts of your model, rebuild the normals of your model. This will make your model
appear smoother and less polygonal.
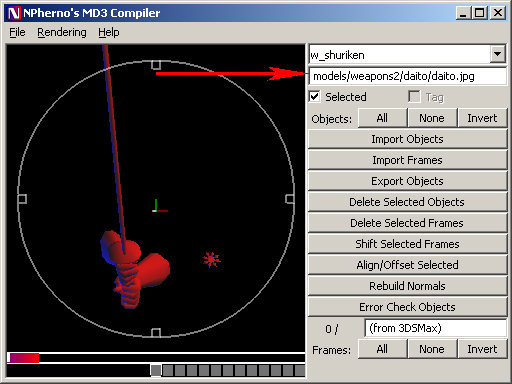
The following is an example of how your image paths should appear. Note that if you have to edit these, it is often advisable to select
objects with the "All" button in order to lock your changes in. Otherwise, sometimes your changes will be discarded.
At this point, ensure you have all of the tags and mesh objects
selected, and export them. When you do so, type the path of the .md3
file into the box that appears, and hit ok.